
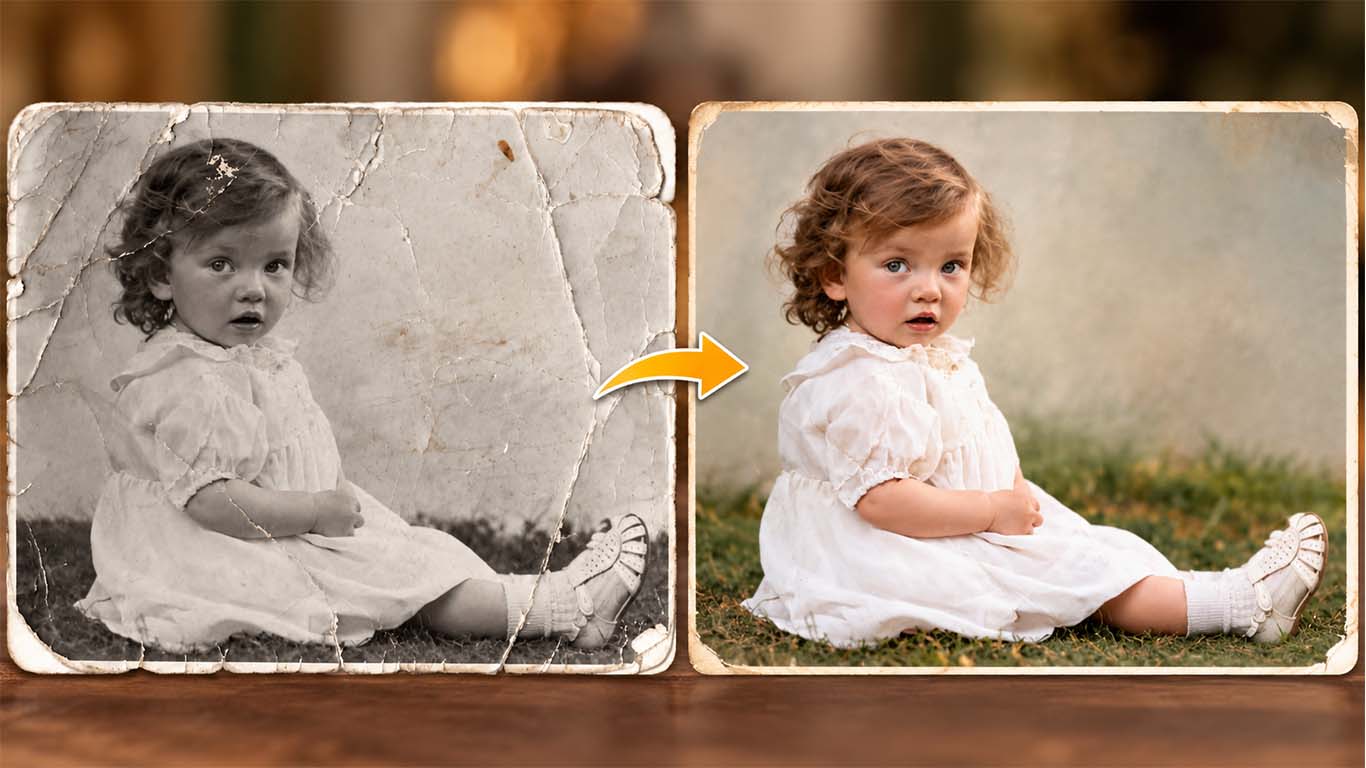
Photo restoration services can repair scratches, fading, and tears in old photos. Learn what restorers do, how to scan, and how to choose a trusted studio.
Silver halides do not last forever. Neither do the dyes in a 1974 Kodacolor print, the albumen binder on a Victorian cabinet card, or the cardboard sleeve a grandmother once tucked a wedding portrait into. Left alone, each drifts toward fog, stain, and fracture.
Most families notice the problem late. A shoebox comes out of a closet after a funeral, a move, or a flood, and the pictures inside have yellowed, curled, or fused together. Faces that were crisp in 1962 now sit behind a milky haze, and the one portrait nobody else owns a copy of has a crease running straight through the eyes.
Skilled photo restoration services can interrupt that decline, rebuilding lost tonality and fine detail while preserving the grain and character of the original. This guide covers why prints fail, what retouchers actually do, how to prepare your photographs, and how to choose a studio you can trust with something irreplaceable. The work is more technical than the word “retouching” suggests. It draws on archival science, optics, and a trained eye for anatomy and period detail, and the gap between a convincing repair and an obvious one usually comes down to restraint.
Whether you hold a single cracked tintype or three generations of faded snapshots, the choices you make before anyone opens an editing program matter as much as the retouching itself. How you handle, scan, and store the originals sets the ceiling for the final result. The sections below start with the causes of damage and end with how to display and protect the finished images.
Why Old Photographs Deteriorate
Every print is a laminate: a paper or metal support, a binder layer, and an image-forming material. Each component ages on its own schedule, and the mismatch between them is what cracks, curls, and clouds a picture. Knowing the mechanism tells you which repairs are routine and which demand a specialist.
Chemical and Environmental Decay
Black-and-white prints develop silvering, a bluish metallic sheen along the darker edges, when oxidized silver migrates to the surface. Chromogenic color prints from the 1960s through the 1990s fade unevenly because the cyan dye breaks down faster than magenta or yellow. The result is a warm, reddish chromatic cast that makes faces look sunburned.
Humidity adds foxing, those rust-colored speckles, along with mold colonies that feed on the gelatin layer. An attic in Phoenix and a basement in Houston will damage a print in different ways, but both will damage it. Heat accelerates dye fade, while moisture accelerates emulsion lift and mildew.
Physical Damage and Handling
Creases, abrasions, and tears usually come from handling rather than chemistry. Prints pressed into magnetic “peel-and-stick” albums fuse to the adhesive. Tape applied decades ago leaves amber stains that wick into the paper fibers, and ballpoint pen on the back of a snapshot can emboss itself into the face of the image.
Water is the worst offender. A flooded closet can weld prints to one another or to the glass of a frame, and separating them often strips the emulsion in patches. Never force a stuck pair apart. Early intervention is cheap by comparison, and photo restoration services can often repair a creased, flaking print that would be unsalvageable after another decade of neglect.
What Photo Restoration Services Include
Reputable photo restoration services work in a fixed sequence: geometry first, then surface defects, then tone and color, and finally texture. Reversing that order wastes effort, because a curve adjustment applied before dust removal exaggerates every speck. The steps below show what happens to your file once it reaches the retoucher.
Scratch, Crack, and Tear Repair
Fine linear defects are rebuilt with healing and cloning tools, often combined with frequency separation. This technique splits an image into fine texture and broad color so a technician can mend one layer without disturbing the other. Cracked emulsion, known as craquelure, appears as a web of hairlines across skin and sky. Each segment is retouched by sampling the tonality of its neighbors.
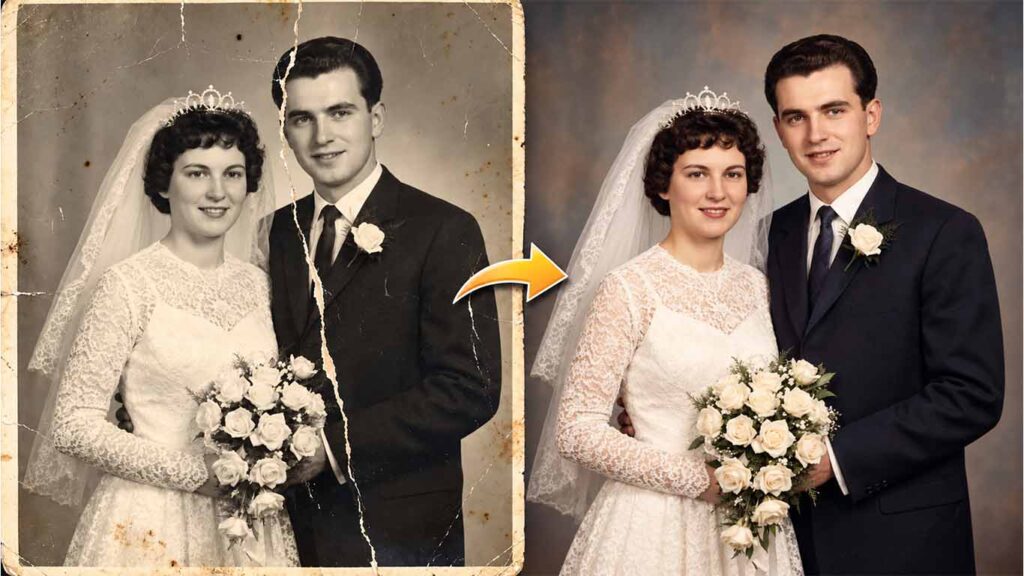
Tears are first realigned in the scan, then bridged. Consider a diagonal fold running across a wedding gown. The repair is only invisible if the lace pattern is matched cell by cell, whereas a careless clone stamp repeats the same flower three times and gives the game away.
Fading, Stains, and Chromatic Cast Correction
Restorers study the histogram of each color channel separately. A faded 1978 print typically shows a collapsed cyan or red channel, and stretching the levels of that channel on its own recovers the missing dynamic range without bleaching skin tones. A global “auto” adjustment cannot do this, because it treats the damage as uniform when it is not.
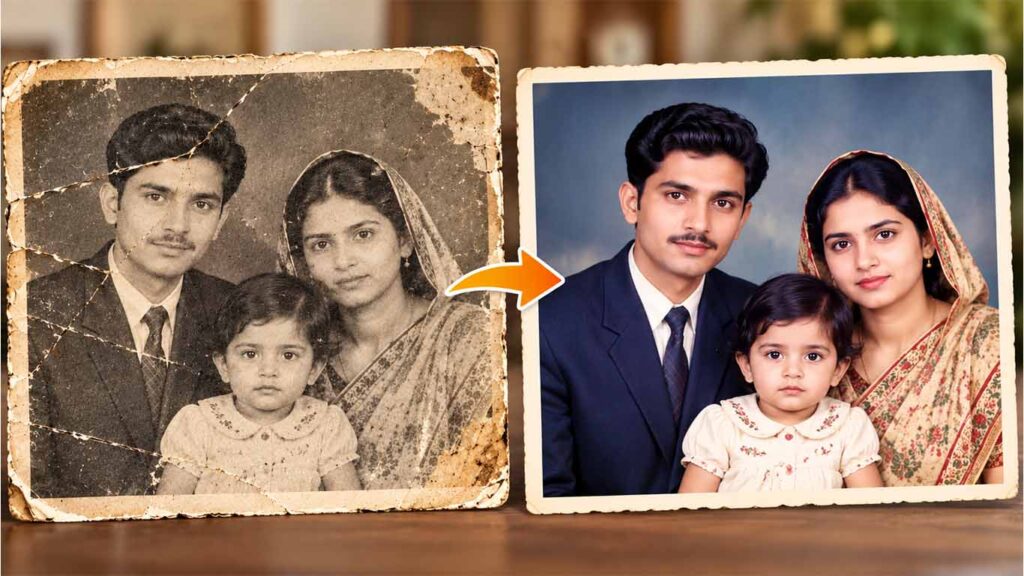
Color correction is where inexpensive photo restoration services most often cut corners, since per-channel work is slow. Yellowed albumen and sepia-toned prints are neutralized and then deliberately re-toned so the warmth reads as period character rather than age. Foxing is removed spot by spot, using masks restricted to the stain’s hue.
Missing Areas and Reconstruction
When a corner is gone or a face is partly obliterated, the job moves from repair to inpainting. A technician rebuilds the area from surviving anatomy, other photographs of the same person, and period-appropriate clothing and hairstyles. Symmetry helps with faces, though no face is perfectly symmetrical, and good retouchers know when to stop mirroring.
The boundary that matters is between reconstruction and invention. Rebuilding a missing shoulder from the visible one is restoration, while giving a stern ancestor a smile is fabrication. A professional provider should tell you which of the two they are proposing before they begin.
Damaged Photo Restoration: Common Problems and Practical Fixes
Damaged photo restoration starts with triage, not software. Before any pixel is touched, a careful studio inspects the physical print: is the emulsion flaking, is mold active, is the support brittle? Active mold needs to be dealt with or isolated before the print goes anywhere near a flatbed scanner.
Three rules save more photographs than any plug-in. Do not tape, do not wet, and do not flatten a curled print by force, because a tightly curled emulsion cracks along the curve when pressed. If a photograph is already in pieces, slide each fragment into a polyester sleeve and photograph the back as well, since inscriptions often carry names and dates.
Torn prints show why a gentle approach pays off. Scanning each fragment separately against a black background and assembling them digitally avoids adhesive entirely and leaves the original untouched. This is why photo restoration services often ask for the loose pieces rather than a hastily taped composite.
Vintage Photo Restoration by Era
Every photographic process has its own failure signature. Knowing those signatures keeps a restorer from “fixing” what is actually authentic to the medium.
Daguerreotypes, Tintypes, and Albumen Prints
A daguerreotype is a silvered copper plate, and the tarnish halos that creep inward from its edges are chemical, not digital, problems. The plate itself should be handled only by a conservator, so digital work happens on a careful scan made with controlled, raking light. Tintypes, which are actually lacquered iron, show rust bloom and extreme contrast, and both qualities should be softened rather than erased.
Albumen prints use an egg-white binder that yellows and develops fine cracking over time. A thoughtful retoucher keeps the warm purple-brown tonality instead of converting everything to neutral gray. Studios that offer photo restoration services for pre-1900 material should be able to explain that distinction without prompting.
Mid-Century Prints and Early Color
Silver gelatin prints with deckled edges are generally stable, but they suffer from halation, a soft glow around bright highlights caused by light bouncing within the film base. Polaroid dye migration, Instamatic color shifts, and Ektachrome’s drift toward magenta each call for a different corrective curve. Vintage photo restoration at this stage is often less about repair and more about rescuing local contrast.
Kodachrome slides are the pleasant exception, as their dyes are far more stable than those of their print contemporaries. If you have a family archive containing both slides and prints from the same decade, the slides often make the best color reference for correcting the faded prints.
Scanning Before Restoring
Everything downstream depends on the capture. A poor scan bakes in blown highlights, clipped shadows, and moiré that no retoucher can fully undo.
Resolution, Bit Depth, and Dynamic Range
For prints up to 5×7 inches, scan at 600 ppi, and move to 1200 ppi for wallet-size images or anything you plan to enlarge substantially. Save as an uncompressed TIFF, and capture at 16 bits per channel whenever the scanner allows it. The extra bit depth matters most for faded images, because stretching levels on an 8-bit file produces visible banding in smooth skies and skin.
Turn off every automatic enhancement in the scanner software. Dust removal, sharpening, and “restore color” filters make irreversible decisions on your behalf, and they make them badly.
Flatbed Scanning vs. Camera Copy
A flatbed handles flat, matte prints well. Glossy, curled, framed, or oversized pieces are better served by copy photography with polarized lighting, which suppresses glare and reveals surface texture. Bracketing exposures, meaning several frames at different brightness levels, captures detail from both the shadows and the highlights of a high-contrast print.
Camera copies need rectilinear correction afterward to remove the keystone distortion caused by any slight angle between sensor and print. Flatbed users should watch for Newton rings, the rainbow interference patterns that appear where a glossy surface touches the glass. Most photo restoration services accept either a mailed original or a scan that meets their specifications, so ask which they prefer before you ship anything.
Colorization, Enhancement, and Upscaling
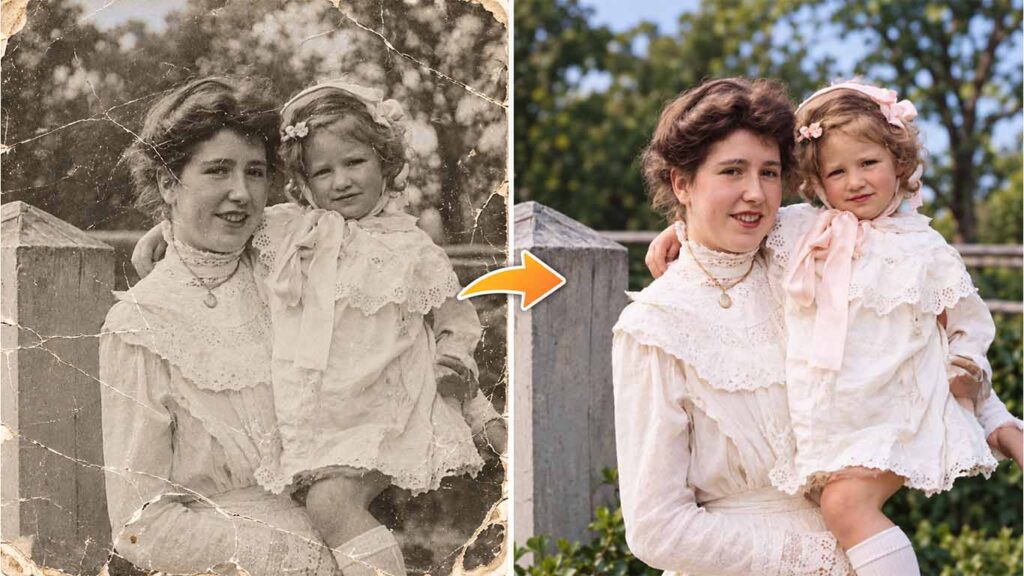
Colorization is a research task disguised as an art task. A good colorist checks the garment, the era, the region, even the paint codes of the cars in the frame. Skin tone is built in layers, with warm undertones in the cheeks and cooler ones near the temples, rather than flooded across the face in one pass.
Automated colorization and upscaling can produce striking results in seconds, but they work by inferring detail, and inference is not memory. A one-click tool may add teeth, lace, or wrinkles that were never there, or it may smooth the grain until a 1950s portrait looks like a plastic mannequin. A studio offering photo restoration services will usually treat colorization as an optional add-on, with a clear note about which colors are documented and which are educated guesses.
Grain is part of the picture. When enlarging a small print, a skilled retoucher often synthesizes matching grain after upscaling so the image keeps its photographic texture instead of looking digitally airbrushed.
How to Choose Photo Restoration Services
The market ranges from solo retouchers with years of darkroom experience to offshore factories running batch actions. The right choice depends on how irreplaceable your image is and how heavy the damage runs.
Portfolio and Process
Ask for before-and-after examples at 100 percent zoom, not thumbnails. Thumbnails hide everything that matters: waxy skin, repeated texture patches, and haloed edges. Look for consistent facial detail and natural film grain across the portfolio.
The best photo restoration services also describe their process in plain language. Find out whether a human retoucher works on each file, whether you receive a proof before final delivery, how many revision rounds are included, and whether you get a layered file along with the flattened image. Ask, too, how your original will be packed and handled if you are mailing it.
Pricing, Turnaround, and Red Flags
Basic cleanups, such as dust, minor scratches, and a quick tonal correction, typically cost a modest per-image fee. Heavy reconstruction of missing faces or large torn areas can run to several hundred dollars, because it takes hours of manual work. Rush fees are common, and they are usually worth paying only when a deadline like a memorial service or an anniversary demands it.
Be wary of a flat price quoted sight unseen for a badly damaged print. Other warning signs include a refusal to show a proof, any demand to keep your original, and suspiciously instant turnaround on complex repairs. Some photo restoration services run everything through an automated pipeline and label the output as hand retouching, so ask directly.
DIY Editing vs. Professional Restoration
Do-it-yourself editing is a reasonable choice for light jobs. A scan with a little dust, a mild yellow cast, and no torn areas can be improved with Levels, Curves, and a spot-healing brush in a free or low-cost editor. Always work on a duplicate layer so you can back out of any mistake, and keep the untouched scan as your master.
Professional help earns its fee when the damage is structural or the image cannot be recreated. Cracked emulsion, missing facial features, severe chromatic cast, and silvered shadows all reward experience. Hiring photo restoration services also removes the hidden cost of your own time, since a difficult repair that takes a beginner a full weekend may take a specialist ninety minutes.
A sensible compromise is to attempt one simple print yourself, compare it with a professional result on a more difficult image, and decide from there. The comparison usually settles the question.
Preservation and Storage After Restoration
A restored file protects the image, but the original print still needs shelter. Store prints in polyester sleeves or acid-free, lignin-free folders that pass the Photographic Activity Test. Buffered paper suits black-and-white gelatin silver prints, while albumen, cyanotype, and color photographs belong in unbuffered enclosures.
Aim for a stable room, roughly 65 to 70°F with relative humidity between 30 and 40 percent. Interior closets beat attics, garages, and basements every time. Keep photographs away from exterior walls, bathrooms, and anything that can leak.
On the digital side, keep a 16-bit TIFF master and a JPEG for sharing. Follow the 3-2-1 rule: three copies, on two kinds of media, with one stored offsite. Embed names, dates, and places in the file metadata, because a restored portrait of an unnamed stranger is only half-saved. Even after photo restoration services deliver clean files, the physical originals deserve the same care.
Sharing and Displaying Restored Photos
Restored images are meant to be seen. Print them with archival pigment inks on cotton-rag paper, a combination rated to last many decades, and avoid drugstore kiosks that use dye-based inks prone to the same fading you just corrected. Frame with UV-filtering glass and keep the print away from direct sun.
Photo books with captions turn a pile of faces into a family narrative. Digital frames and shared albums suit relatives who live far away, and a quiet evening of naming people in the background of group portraits can capture memories before the last person who knows them is gone. If you plan to restore old photos in batches, start with the oldest and most fragile ones, since they have the least time to spare.
Conclusion
Photographs fail slowly and then all at once: a humid summer, a leaking pipe, a careless tape job. The good news is that most of the damage is recoverable, provided the original is handled gently, scanned properly, and passed to someone who understands both the medium and the ethics of repair.
Choosing the right photo restoration services comes down to evidence: sharp before-and-after samples, a transparent process, honest pricing, and respect for the original. Scan your most fragile prints first, protect the originals in archival enclosures, and keep a labeled digital master. The faces in those pictures have waited long enough.